Create and set up a Kanzi Studio project
In this step you create and set up a Kanzi Studio project with C application, set the application background image, and create the custom property type that define the property the dynamic object generator uses to load the content to the trajectory list box.
Assets for the tutorial
The assets you use in this tutorial are stored in <KanziWorkspace>/Tutorials/Object generator/Start here:
- bin contains the source file that contains the list of items that the object generator displays.
- Images contains the background image and the image for the item that the trajectory list box shows.
- src contains the source code for the application in this tutorial.
<KanziWorkspace>/Tutorials/Object generator/Object generator directory contains the completed tutorial.
Create and set up the project
To create a Kanzi project, import assets, and load materials used in this tutorial:
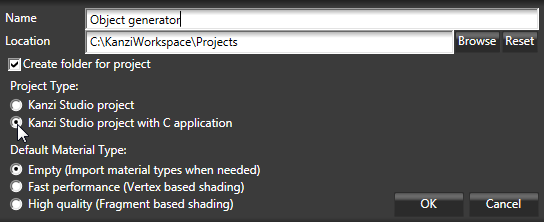
- In Kanzi Studio Quick Start window click New Project...:
- Choose the name and location for your project.
For example, name your project Object generator. - In Project Type select Kanzi Studio project with C application.
Kanzi creates a Kanzi Studio project in <KanziWorkspace>/Projects/<ProjectName>/Tool_project directory and the structure for the Visual Studio solution for your project in <KanziWorkspace>/Projects/<ProjectName>/Application:
- bin directory contains the binaries and configuration files of your project.
- configs directory contains the configuration files for different platforms. By default Kanzi creates configuration files for Android and Windows operating systems. The recommended platform for developing Kanzi applications is Microsoft Visual Studio 2010.
- src contains the source code for your project.
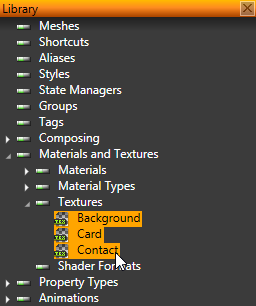
- Select > Import Images, go to <KanziWorkspace>/Tutorials/Object generator/Start here/Images and import all images.
Kanzi Studio imports all images, creates textures from the images, and places the textures in the Library > Materials and Textures > Textures.
- In the Library right-click Materials and Textures, select Load Material Type From Disk, and select Textured.kzmat material type.
Kanzi Studio adds Textured material type and TexturedMaterial to Materials and Textures.
You use this material to add a texture to the prefab that is used as the item that the trajectory list box shows.
Set the background image for the application
To set the background image for the application:
- In the Project right-click the Root Layer select Create > Image Layer, and move the Image Layer above the Viewport Layer.
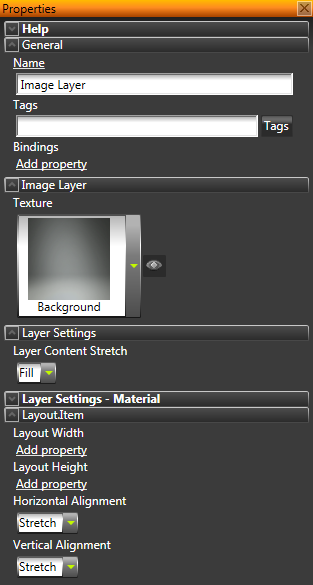
- In the Project select the Image Layer and in the Properties set:
- Texture property to Background.png
- Layer Content Stretch to Fill
- Horizontal Alignment and Vertical Alignment to Stretch
- In the Library select Composing > Composers > Composer > Render Pass and in the Properties in Color Buffer disable the Clear Enabled property.
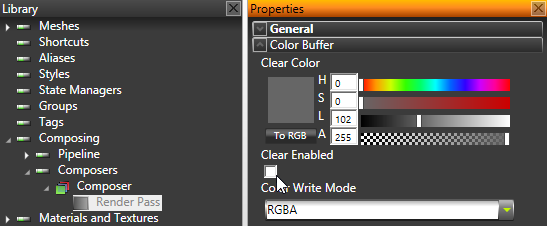
By disabling the Clear Enabled property you tell Kanzi to render the image layer you set as the background for the application.
Create the property type used by the dynamic object generator
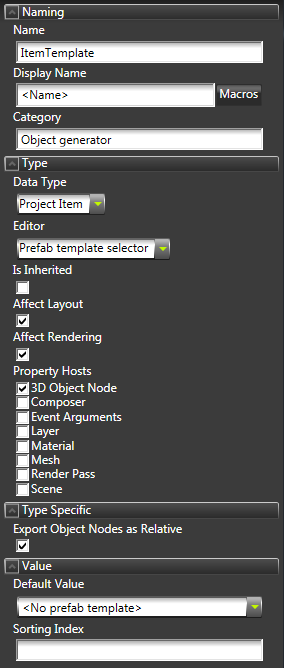
To create the property type for the property that the dynamic object generator uses to access the items listed in the trajectory list box, right-click Library > Property Types, select Create Property Type and use these settings:
- Name to ItemTemplate
You use the same name in the C application to refer to this property.
- Category to Object generator
By assigning the property to a category you create a structure for your properties, so you can find them in Kanzi Studio quickly.
- Data Type to Project Item
- Editor to Prefab template selector
- Enable Affect Layout
- Enable Affect Rendering
- In Property Hosts enable 3D Object Node
< PREVIOUS STEP
NEXT STEP >
See also
Creating custom property types
Property system
Using material types
Creating textured materials
Shaders
Open topic with navigation